Python and Flask
This tutorial will show you how to use the Lokalise preprocessing and postprocessing feature to manage uploaded and downloaded translations in your Flask app.
In this tutorial you'll learn how to...Implement custom processors for Lokalise using Ruby on Rails.
Prerequisites
This guide assumes that you have a Lokalise project (if not, learn how to create your Lokalise project here).
If you want to follow this guide locally on your computer, you need to have the following software installed:
- Python (version 3.7 or above)
- Code editor
What we are going to build
We are going to create a simple application that will process translations that you'll import and export on Lokalise. The app will then process translations and remove any banned words.
Preparing a new app
First of all, let's create a virtual environment in the app's root and install Flask, Gunicorn, and the Python SDK by running the following commands:
python3 -m venv venv
. venv/bin/activate
pip install Flask gunicorn python-lokalise-api
If you are on Windows, run:
py -3 -m venv venv
venv\Scripts\activate
pip install Flask gunicorn python-lokalise-api
Thecreate a Procfile in the project root with the following contents:
web: gunicorn wsgi:appThis file will be used by Heroku to properly start our app. If you are using another hosting platform, you might need to use a different approach.
Next, create a runtime.txt file with the Python version:
python-3.10.4Create a file called wsgi.py:
from app.main import app

if __name__ == "__main__":
    app.run()
Now create a folder called app with a main.py file in it:
import re
from flask import Flask, request

app = Flask(__name__)
Performing preprocessing
So, now let's see how to perform translations preprocessing. For example, suppose we want to iterate over the uploaded translations and remove a "BANNED" word from them.
To achieve that, simply add a new preprocess action:
@app.route('/preprocess', methods=['POST'])
def preprocess():
    data = request.get_json()

    for keyId, key in enumerate(data['collection']['keys']):
        for transId, trans in enumerate(key['translations']):
            data['collection']['keys'][keyId]['translations'][transId]['translation'] = re.sub('BANNED', '', trans['translation'])

    return data, 200
Note that we must respond with a JSON payload preserving the original structure otherwise the import will fail.
Enabling preprocessor
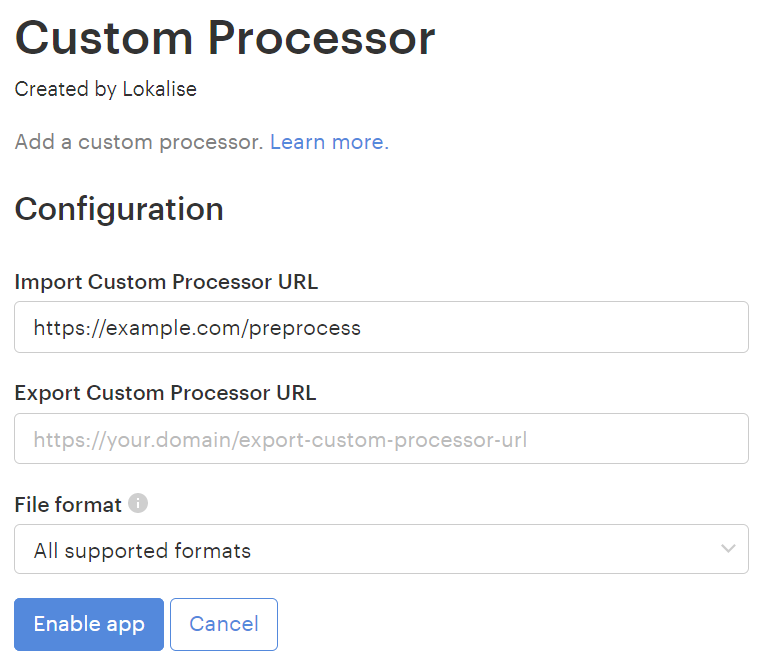
Now that the preprocessor is ready, we have to enable it on Lokalise. To achieve that, open your Lokalise project, proceed to Apps, find Custom processor in the list and click on it. Then click Install and configure this app by entering a preprocess URL:

By default preprocessor will be run for every uploaded translation file but you can narrow the scope by choosing one of the file formats from the corresponding dropdown.
Once you are ready, click Enable app. Great job!
Postprocessing translations
Now let's perform a very similar thing and remove "BANNED" words from the downloaded translations.
To achieve that, add a postprocess action:
@app.route('/postprocess', methods=['POST'])
def postprocess():
    data = request.get_json()

    for keyId, key in enumerate(data['collection']['keys']):
        for transId, trans in enumerate(key['translations']):
            data['collection']['keys'][keyId]['translations'][transId]['translation'] = re.sub('BANNED', '', trans['translation'])

    return data, 200
This is it!
Enabling postprocessing
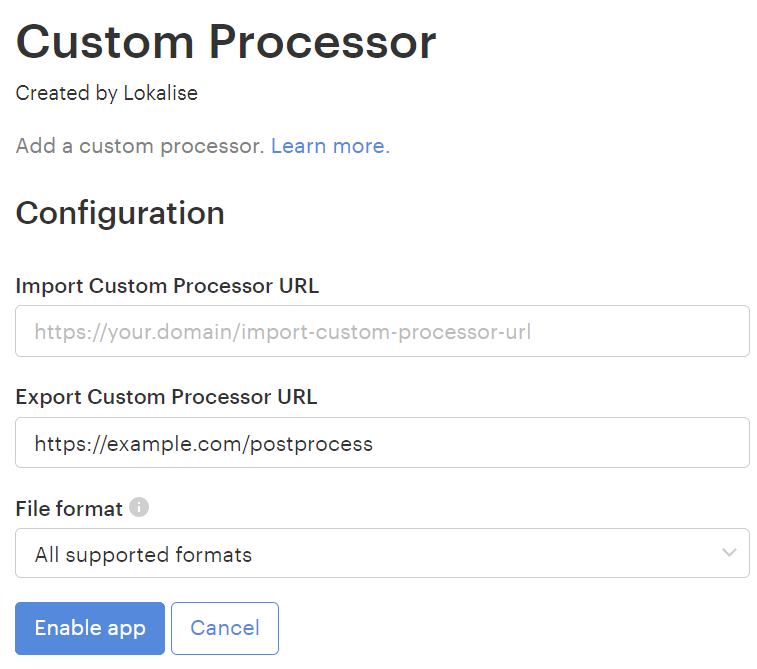
Now that the app is finalized, we have to enable postprocessing on Lokalise. To achieve that, open your Lokalise project, proceed to Apps, find Custom processor in the list and click on it. Then click Install and configure this app by entering a postprocess URL:

By default postprocessor will be run for every uploaded translation file but you can narrow the scope by choosing one of the file formats from the corresponding dropdown.
Once you are ready, click Enable app. Great job!
Updated 6 months ago