Ruby on Rails
This tutorial will show you how to use the Lokalise Ruby SDK to manage translation files and how to implement an OAuth 2 flow.
In this tutorial you'll learn how to...
- Work with Lokalise API tokens
- Upload translation files with the Lokalise API
- Download translation files with the Lokalise API
- Implement an OAuth 2 flow
- List customer projects
- Act on the customer's behalf and upload/download translation files
You can find thesource code at GitHub.
Prerequisites
This guide assumes that you have already created a Lokalise project (if not, learn how to create a new project in this guide). In this tutorial, we are going to upload English translations. Therefore, make sure that your project has the English language added with the en ISO code.
If you want to follow this guide locally on your computer, you need to have the following software installed:
What we are going to build
In the first part of this tutorial, we are going to create a simple Rails app that will upload an English translations file to your Lokalise project and download it back.
In the second part, we'll implement an OAuth 2 flow and act on the user's behalf to upload and download translation files to or from their project.
Preparing a new Rails app
Create a new Rails app by running the following command:
rails new LokaliseApiDemoThis is going to create an application skeleton for you.
Let’s also add two new files:
app/controllers/downloads_controller.rbapp/controllers/uploads_controller.rb
Open the config/routes.rb file and tweak it in the following way:
  resources :downloads, only: %i[new create]
  resources :uploads, only: %i[new create]
Installing dependencies
Open your Gemfile and add new gems in it, like so:
gem 'ruby-lokalise-api', '~> 6.0'
gem 'dotenv-rails', '~> 2.7'
gem 'rubyzip', '~> 2.3'- ruby-lokalise-api is our official API client
- dotenv-rails will be used to safely store environment variables
- rubyzip will be used to read ZIP files
Then run:
bundle installTo install the newly added dependencies.
Adding translation files
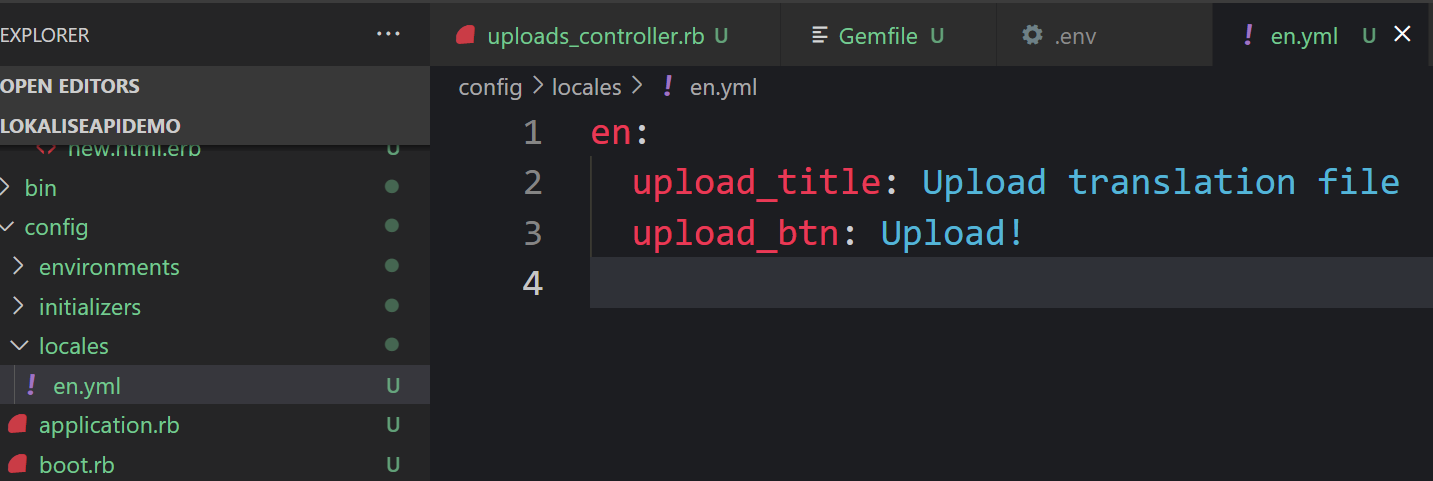
Next, proceed to the config/locales directory and open the en.yml file. This file contains English translations for your app. Let’s create four translation keys inside it:
en:
  upload_title: Upload translation file
  upload_btn: Upload!
  download_title: Download translation file
  download_btn: Download!
Working with API tokens
Getting an API token to use the Lokalise API
Create an .env file in the root of the project and add your Lokalise API token. Make sure to add an API token with read and write access to your Lokalise projects. Learn how to get a Lokalise API token.
LOKALISE_API_KEY=123secret456
Never publicly expose your API key!Specifically, don’t forget to add the
.envfile to.gitignore.
Initializing the Client
Next, open uploads_controller.rb, load the Ruby SDK, and initialize an API client in the create action:
require 'ruby_lokalise_api'

class UploadsController < ApplicationController
  def new
  end

  def create
    client = RubyLokaliseApi.client ENV['LOKALISE_API_KEY']
  end
end
Getting your Lokalise project ID
Now add a new environment variable inside your .env file with your Lokalise project ID. Learn how to get the Lokalise project ID.
LOKALISE_PROJECT_ID=123.abcWe can now use these translations inside the views/uploads/new.html.erb file:
<h1><%= t 'upload_title' %></h1>

<%= button_to t('upload_btn'), uploads_path %>
Uploading translation files to your Lokalise project
Let’s write a simple script to upload the en.yml file to your Lokalise project. Please note that its contents must be Base64-encoded.
def create
  client = RubyLokaliseApi.client ENV['LOKALISE_API_KEY']

  file_content = File.read "#{Rails.root}/config/locales/en.yml"

  client.upload_file ENV['LOKALISE_PROJECT_ID'],
                              data: Base64.strict_encode64(file_content.strip),
                              filename: "en.yml",
                              lang_iso: "en"

  redirect_to new_upload_path
end
Now that everything is ready, you can boot your server by running:
rails sThen open your browser, proceed to http://localhost:3000/uploads/new, and click the "Upload!" button. After a couple of seconds your translation file should be uploaded to Lokalise.
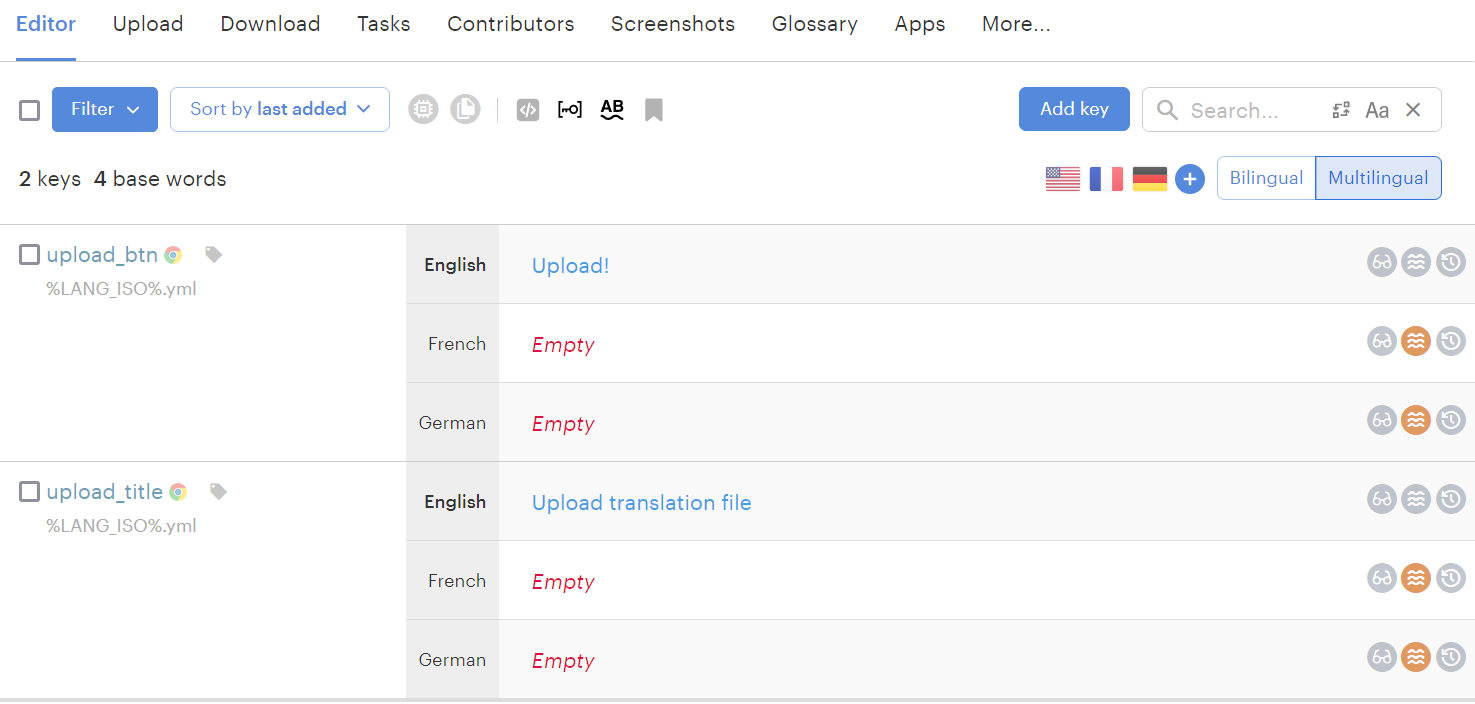
Proceed to Lokalise, open your newly created project, and make sure the translation keys are present in the editor:

Great job!
Downloading translation files from Lokalise project
The download process is slightly more involved because we'll have to process a ZIP archive. First of all, let's tweak the view at views/downloads/new.html.erb:
<h1><%= t 'download_title' %></h1>

<%= button_to t('download_btn'), downloads_path %>
Now tweak the downloads_controller.rb:
require 'ruby_lokalise_api'
require 'open-uri'
require 'zip'

class DownloadsController < ApplicationController
  def new; end

  def create
    client = RubyLokaliseApi.client ENV['LOKALISE_API_KEY']

    zip_file = client.download_files(ENV['LOKALISE_PROJECT_ID'],
                                                      format: 'yaml',
                                                      placeholder_format: :icu,
                                                      yaml_include_root: true,
                                                      original_filenames: true,
                                                      directory_prefix: '',
                                                      indentation: '2sp',
                                                      filter_langs: %w[en])['bundle_url']

    open_and_process zip_file

    redirect_to new_download_path
  end
end
We are downloading the English translation files in YAML format. Of course, you can further adjust the download options: for example, if you exclude the filter_langs param, translations for all languages will be included in the download bundle.
Code the open_and_process private method:
class DownloadsController < ApplicationController
  # ...

  private

  def open_and_process(path)
    Zip::File.open_buffer(open_remote(path)) do |zip|
      zip.each do |entry|
        next unless entry.name == 'en.yml'
        process_zip(entry)
      end
    end
  end
end
As long as we would like to download a single translation file, we compare entry.name with the "en.yml" string. You can further adjust this condition to select all the files you are interested in.
Finally, add methods to open an archive and process its contents:
class DownloadsController < ApplicationController
  # ...

  private

  def open_remote(path)
    parsed_path = URI.parse(path)
    parsed_path.open
  end

  def process_zip(entry)
    data = YAML.safe_load(entry.get_input_stream.read)

    File.open(File.join(Rails.root, 'config', 'locales', entry.name), 'w+:UTF-8') do |f|
      f.write data.to_yaml
    end
  end
end
Basically, we are overwriting the existing content inside the config/locales/en.yml file with the content fetched from Lokalise.
Your existing translations will be overwritten!Please remember that the current implementation overwrites any translations inside the
en.ymlfile with the new ones. If you don't want this to happen, save your new translations to a file with another name. For example, you could put something likeFile.join(Rails.root, 'config', 'locales', "updated_#{entry.name})
Now you can adjust translations in Lokalise as you see fit, proceed to http://localhost:3000/downloads/new, click the "Download!" button, and make sure your translation file is updated accordingly. For example, you can try modifying the download_title translation key and making sure the header is updated accordingly after you press the "Download!" button.
Working with an OAuth 2 flow
Registering an OAuth 2 app
To get started, please reach out to our tech support and ask them to register an OAuth 2 app for you (if you don't have one registered already). You will be presented with the Lokalise client ID and client secret that we will be using in the next steps.
You can store these keys in the .env file:
OAUTH2_CLIENT_ID=your_id
OAUTH2_CLIENT_SECRET=your_secret
Never publicly expose your OAuth 2 client secret!Specifically, don’t forget to add the
.envfile to.gitignore.
Implementing an OAuth 2 flow
Let's create a new oauth2_flows_controller.rb with the following content:
require 'ruby_lokalise_api'

class Oauth2FlowsController < ApplicationController
  def new
    @auth_url = auth_client.auth scope: %(read_projects read_files write_files),
                                                   redirect_uri: 'http://localhost:3000/oauth2_flows/callback',
                                                   state: rand(10_000)
  end

  private

  def auth_client
    RubyLokaliseApi.auth_client ENV['OAUTH2_CLIENT_ID'], ENV['OAUTH2_CLIENT_SECRET']
  end
end
In the new action, we are generating a special authentication URL that your customers will have to visit to log in via Lokalise and obtain a special token. We'll require this token to act on the customer's behalf.
The scope attribute contains an array of permissions you would like to request from the customer. As long as we want to fetch a list of customer projects and manage translation files, we'll provide three scopes.
The redirect_uri is the location where the customer will be redirected after granting the requested access rights.
state is a sequence of random characters to prevent CSRF attacks.
Now let's implement the callback action where the customer will land after logging in via Lokalise:
class Oauth2FlowsController < ApplicationController
  # ...

  def callback
    response = auth_client.token params[:code]
    session[:lokalise_token] = response.access_token
    session[:lokalise_refresh] = response.refresh_token

    redirect_to new_oauth2_flow_path
  end
end
params[:code] is a secret code that Lokalise will generate for you. By calling the token method along with the code, you are requesting an OAuth 2 access token as well as a refresh token. The access token is used to act on the user's behalf, but it has a limited lifespan (usually 3600 seconds; this value can be fetched with response.expires_in). After the token expires, you can refresh it by using refresh token: response = auth_client.refresh 'YOUR_REFRESH_TOKEN'. The response.access_token will contain a new token.
We are storing these two tokens in session and redirecting the user back to the new action.
Finally, we can add an action to clear the tokens and the chosen project (we'll get to this in a moment):
class Oauth2FlowsController < ApplicationController
  # ...

  def log_out
    session.delete :lokalise_token
    session.delete :lokalise_refresh
    session.delete :lokalise_project_id
    redirect_to new_oauth2_flow_path
  end
end
At this point, we can open views/oauth2_flows/new.html.erb and provide a minimalistic markup:
<h1>OAuth 2 flow</h1>

<% if session[:lokalise_token].present? %>
  Your OAuth 2 token: <%= session[:lokalise_token] %><br>
  Your OAuth 2 refresh token: <%= session[:lokalise_refresh] %><br>
  Your Lokalise project id: <%= session[:lokalise_project_id] %><br>

  <%= link_to 'Choose a project to work with', projects_path %><br>
  <%= link_to 'Upload file', new_upload_path %><br>
  <%= link_to 'Download file', new_download_path %><br><br>
  <%= link_to 'Log out', log_out_oauth2_flows_path %>
<% else %>
  <%= link_to 'Log in via Lokalise', @auth_url %>
<% end %>
Choosing a project to work with
The next step is allowing the customer to choose a project that they'd like to interact with. Therefore, create a new projects_controller.rb:
require 'ruby_lokalise_api'

class ProjectsController < ApplicationController
  before_action :check_token

  def index
    client = RubyLokaliseApi.oauth2_client session[:lokalise_token]
    @projects = client.projects(limit: 5000).collection.map { |p| { id: p.project_id, name: p.name } }
  end

  def choose
    session[:lokalise_project_id] = params[:project_id]
    redirect_to new_oauth2_flow_path
  end
end
Inside the index action, we use the customer's access token to fetch all projects and extract their IDs and names.
The choose action is used to actually pick one of the projects and store its ID in session.
Let's also open the application_controller.rb and add two methods:
class ApplicationController < ActionController::Base
  private

  def check_token
    redirect_to new_oauth2_flow_path unless session[:lokalise_token].present?
  end

  def check_project_id
    redirect_to new_oauth2_flow_path unless session[:lokalise_project_id].present?
  end
end
We'll use those to check whether the customer has logged in via Lokalise and has chosen a project.
Finally, open the views/projects/index.html.erb and add the following markup:
<h1>Choose a project to work with</h1>

<ul>
  <% @projects.each do |project| %>
    <li>
      <%= button_to project[:name], choose_projects_path(project_id: project[:id]) %>
      ID: <%= project[:id] %>
      <% if session[:lokalise_project_id] == project[:id] %>
        (currently chosen)
      <% end %>
    </li>
  <% end %>
</ul>
We simply display a list of all projects with buttons to choose one of them. Later, the customer can return to this page and choose another project as needed.
Setting up routes
Let's add all the necessary routes to the config/routes.rb file:
  # ...

  resources :oauth2_flows, only: %i[new] do
    collection do
      get 'callback'
      get 'log_out'
    end
  end

  resources :projects, only: %i[index] do
    collection do
      post 'choose'
    end
  end

  root 'oauth2_flows#new'
Uploading translation files on the user's behalf
The process of uploading files on the user's behalf is very similar to what we did with the regular API tokens. In fact, the only difference is how you instantiate the client and provide the project ID. Previously we wrote:
client = RubyLokaliseApi.client ENV['LOKALISE_API_KEY']

client.upload_file session[:lokalise_project_id] # ...
Now we should use the oauth2_client method instead, and fetch project ID from the session store:
client = RubyLokaliseApi.oauth2_client session[:lokalise_token]

client.upload_file session[:lokalise_project_id],
                            data: Base64.strict_encode64(file_content.strip),
                            filename: 'en.yml',
                            lang_iso: 'en'
Here's the full code for the "uploads" controller (note the usage of "before actions"):
class UploadsController < ApplicationController
  before_action :check_token
  before_action :check_project_id

  def new; end

  def create
    client = RubyLokaliseApi.oauth2_client session[:lokalise_token]

    file_content = File.read "#{Rails.root}/config/locales/en.yml"

    client.upload_file session[:lokalise_project_id],
                                data: Base64.strict_encode64(file_content.strip),
                                filename: 'en.yml',
                                lang_iso: 'en'

    redirect_to new_upload_path
  end
end
Downloading translation files on the user's behalf
The process of downloading files is once again very similar to what we did with the regular tokens. The only difference is how you instantiate the client and provide the project ID. Here's the full code for the "downloads" controller:
require 'ruby_lokalise_api'
require 'open-uri'
require 'zip'

class DownloadsController < ApplicationController
  before_action :check_token
  before_action :check_project_id

  def new; end

  def create
    client = RubyLokaliseApi.oauth2_client session[:lokalise_token]

    zip_file = client.download_files(session[:lokalise_project_id],
                                                      format: 'yaml',
                                                      placeholder_format: :icu,
                                                      yaml_include_root: true,
                                                      original_filenames: true,
                                                      directory_prefix: '',
                                                      indentation: '2sp',
                                                      filter_langs: %w[en])['bundle_url']

    open_and_process zip_file

    redirect_to new_download_path
  end

  private

  def open_and_process(path)
    Zip::File.open_buffer(open_remote(path)) do |zip|
      zip.each do |entry|
        next unless entry.name == 'en.yml'
        process_zip(entry)
      end
    end
  end

  def open_remote(path)
    parsed_path = URI.parse(path)
    parsed_path.open
  end

  def process_zip(entry)
    data = YAML.safe_load(entry.get_input_stream.read)

    File.open(File.join(Rails.root, 'config', 'locales', entry.name), 'w+:UTF-8') do |f|
      f.write data.to_yaml
    end
  end
end
Testing it out
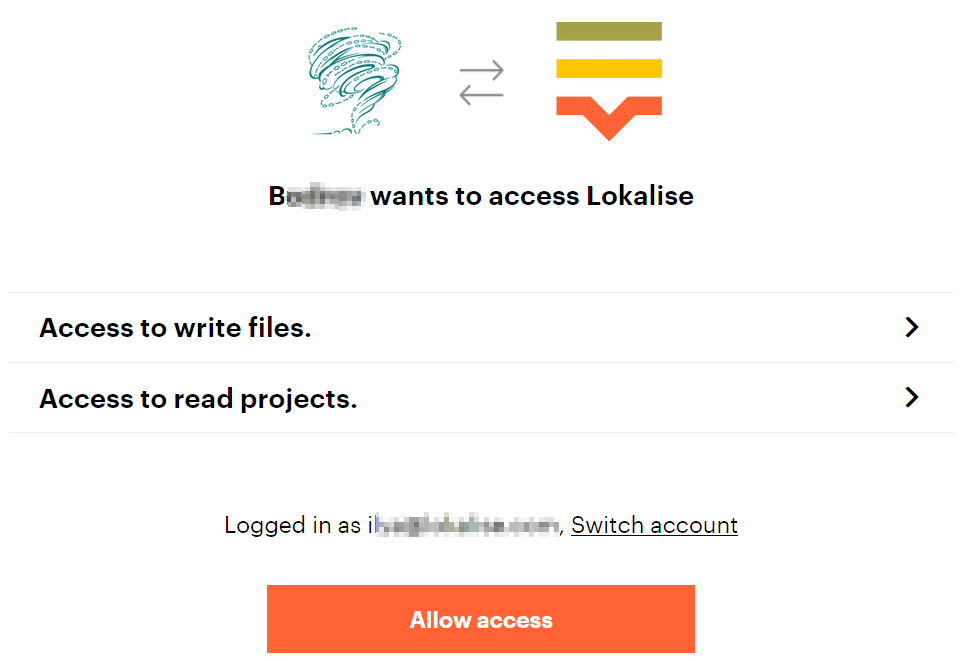
Proceed to http://localhost:3000/oauth2_flows/new, and click "Log in via Lokalise". You'll be navigated to Lokalise and asked to grant the necessary permissions to your application:

Click "Allow access". You'll be navigated back to your app.
Next, click "Choose a project to work with", and select one of the projects.
Finally, click either "Upload file" or "Download file", and perform the uploading/downloading process as before. Make sure that your translations are updated accordingly.
That's it, great job!
Updated 6 months ago
- Explore Lokalise API endpoints and see other possibilities with Lokalise
- Check out Lokalise developer tutorials
- Use Ruby file manager for Lokalise gem to easily import and export translation files to/from your Ruby projects
- Use the LokaliseRails gem to integrate your Rails app with Lokalise
- Lokalise API: "Hello world" app with Node
- Use omniauth-lokalise gem which makes the process of setting up OAuth 2 flow even simpler.